ContextCapture, a photogrammetry software, automates the generation of high-resolution 3D representations from digital photographs and/or point clouds. These images can come from a number of sources such as cameras, drones, phones, and aircrafts. In simple terms, you take overlapping photos of an asset, bring them into ContextCapture, and it automatically generates a 3D mesh.
First, when tackling a photogrammetry software please invest some time in properly capturing your data. Generally, when a project fails it is due to bad data coverage and collection, but if you get it right then processing your data is a breeze.
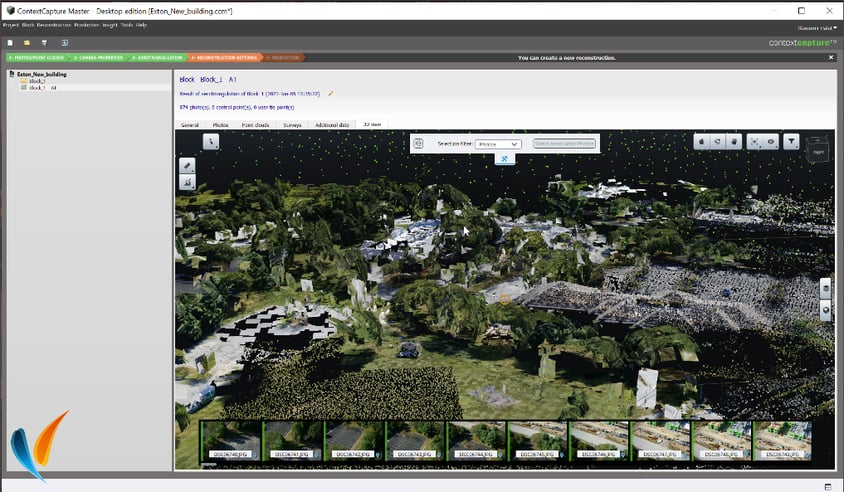
Once you have loaded your images into ContextCapture, you will have to run an Aerotriangulation (AT). This is an automatic process in which ContextCapture calculates the position and rotation of each image and identifies pixels in two or more different photographs which correspond to the projections of a same physical point in the scene.
The visual result of this AT is like a draft version of your final mesh which can be used for quality review e.g. checking if you have captured everything correctly. You can even click on this rough model to bring up the original photos for further inspection. We also have some handy presets when capturing cell towers, or complex scenes.
Next up, ensuring positional accuracy within your mesh. ContextCapture can handle photographs that have no positioning data which generates a 3D mesh with arbitrary position, rotation and scale. But it also natively supports several types of positioning data including GPS tags, control points, RTK, PPK and most importantly QR codes.
QR codes come in different formats depending on what type of data you wish it to hold, or the height you are flying at. For example, an April tag can be detected automatically from a tag size of around 35 pixels.
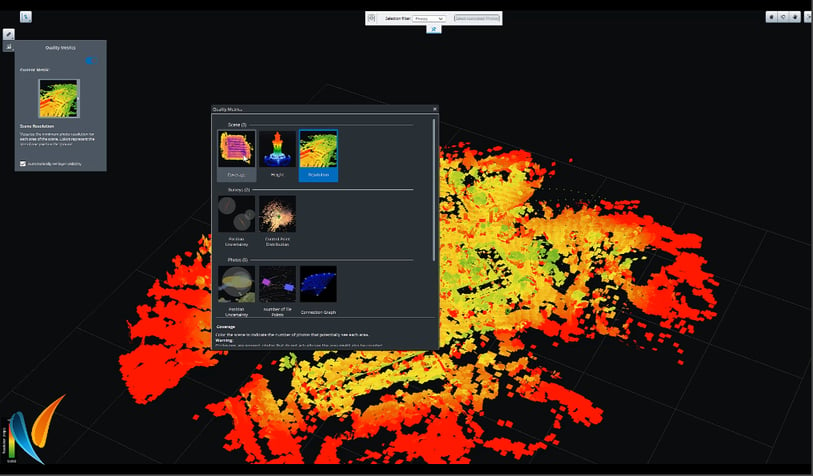
After your AT is complete, ContextCapture will produce a standard quality report where you can delve into the finite details like camera calibrations, RMS, distortions, and scene coverage. Or you can inspect scene resolution/coverage via the 3D view in the AT. This essentially creates a heat-map of the values you wish to inspect.
Last step, you are ready to produce your 3D mesh. Traditionally, photogrammetry is very resource heavy when it comes to processing meshes, it loves to eat up RAM and GPUs. ContextCapture offers “Adaptive tiling” which will cut your project into tiles and dedicate a specified amount of RAM to each tile. This means you can utilize ContextCapture on an off-the-shelf laptop, without it bursting into flames.
ContextCapture can produce outputs including orthophotos, point clouds, and a wide variety of meshes including Bentley native 3SM and 3MX. These formats are known as multi-resolution meshes; think of it like Google Maps the way you zoom in and out and more detail loads. This makes streaming large amounts of data much easier and faster. Single level meshes can be a nightmare to work with once a project goes over a certain size, and they are tough to host online.
Congratulations! You have just produced your first mesh, yet this is the only tip of the iceberg of what ContextCapture can do. The software also hosts a full CAD engine underneath its hood that can help you tackle numerous surveying, construction, inspection, or engineering related projects. Have a look at this 2 minute video to see ContextCapture workflow in action.
Watch our OnDemand webinar Digital Construction with Reality Modeling